TMR Direct provides the following guidelines to help ensure the best print quality for your mailing components. While some deviation from these standards can be accommodated, the more deviation, the more risk of poor print quality. Our goal is always your satisfaction. If you have questions about whether your artwork is suitable for print production, please drop us a line here, or reach out to your assigned project manager directly.
Color Mode
All color artwork and/or images should be provided in CMYK (cyan, magenta, yellow, black) color mode. Artwork submissions in RGB (red, green, blue) color space and Pantone (spot colors) convert to CMYK process color during preflight processing (this can render unexpected color output).
Rich Black
Apply a “Rich Black” color build (C=60 M=40 Y=40 K=100) to larger fills of black or font sizes greater than 3/8″ wide to ensure a dense color. Our color build maximum is 240% total across all four cmyk screens. Any color builds greater than 240% may not print properly.
Print Resolution
All files must have a minimum resolution of 300 ppi (pixels per inch) resolution. Set line art images (1-bit) to a minimum 600dpi (1200dpi preferred) at the actual print size. For best printing quality for logos and line art, use or provide vector artwork (.ai, .eps) if available.
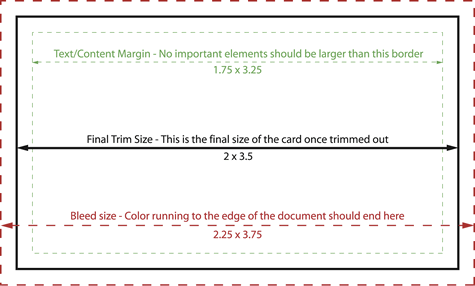
Bleeds & Margins
Create a a 1/8” (.125”) bleed on all sides of your artwork past the final trim edge. Keep all vital text and image elements 1/8” (.125”) from the final trim edge for safety.
Fonts
Embed or outline all fonts in your artwork.
Lines and Rules
For all lines and rules, be sure the thickness is no less than 0.25 pts. Lines less than this value may not print properly or may be converted to raster during preflight.
Booklet Files
Please submit booklets as one press-ready PDF file. Submit your document in single page layout, not as printer spreads. Place all pages in sequential order as the book would open to the viewer’s eye. Page 1 is always the cover and the last page should always be the back cover.
Are you building your document artwork with Canva?
Not originally created for print design, Canva® continues expanding capability. However, there are essential steps to make sure your files are set up correctly for commercial printing.
Before you begin designing, turn on the print bleed setting. This function allows you to view items “bleeding” beyond the trim edge of the page.
These instructions and screenshots provide a general guide; however, the actual steps in Canva may change over time. If you need additional assistance please contact Canva support. You may also want to watch this helpful video tutorial provided by Create with Canva.
How to set up your print document in Canva
- Click on “File” in the top left corner of your screen.
- Then check “Show print bleed.” Bleed lines are essential for all photos and colors that extend to the edge of the page.
- Due to the risk of a shift when cutting, make sure you extend the images outside of the bleed line to guarantee your document does not have a white stripe along the side of your page.

When you are happy with your design, it’s time to download the print files.
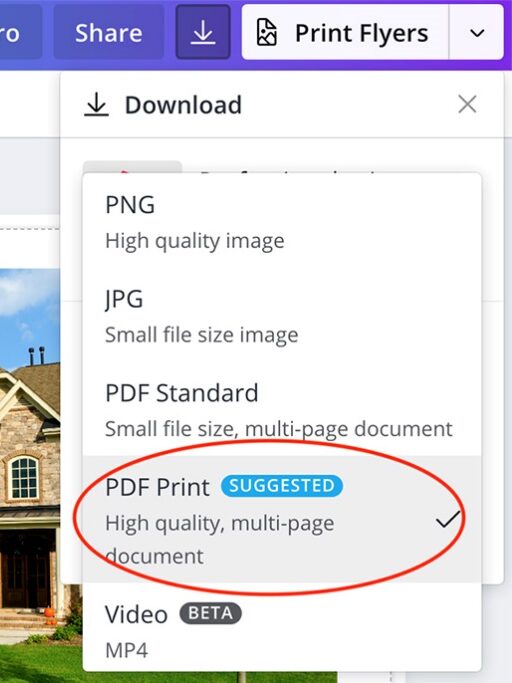
Download your print document from Canva
- Start by clicking the download button in the top right.
- Under “File Type,” select “PDF Print” (NOT “PDF Standard”).
- Check “Crop marks and bleed”.
- Download your files in a single-page PDF format.
- Click “Download”.
Congratulations! You’re a Canva printing pro!